
The Canon C100 produces a very nice, very detailed image just like its bigger brother, the C300. However, the C100 uses AVCHD as its internal codec and Canon have chosen (yet again) a slightly odd version of this standard that creates problems in Non Linear Edit software such as Premiere Pro and Final Cut Pro X (excellent article by Allan Tépper, ProVideo Coalition).
Unless you perform a couple of extra steps, you may notice that the images have aliasing artifacts – stair steps on edges and around areas of detail.
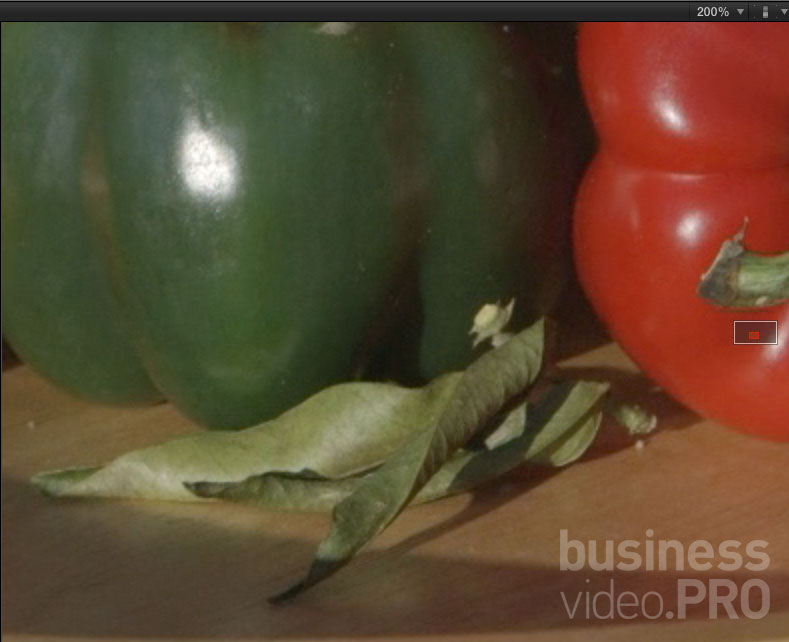
PP6 – Edges before:
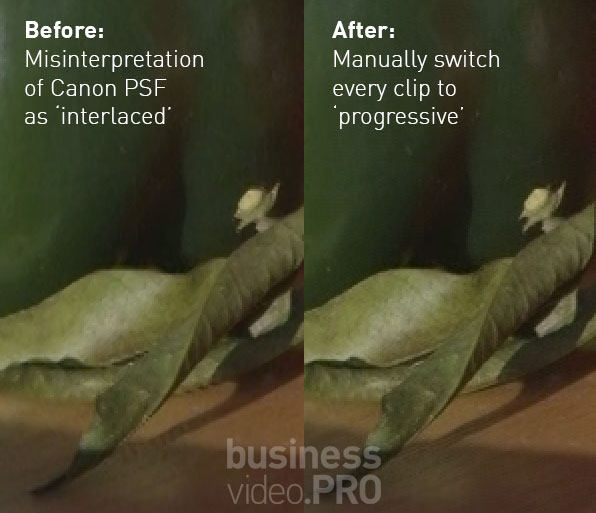
Here’s an example of the problem from within Adobe Premiere Pro, set to view the C100’s AVCHD footage at 200%. Note the aliasing around the leaves in the centre of the picture (click it to see a 1:1 view). Premiere has interpreted the progressive video as interlaced, and is ‘deinterlacing it’ by removing alternate lines of pixels and then ‘papering over the cracks’. It’s not very pretty.

PP6 – Interpret footage:
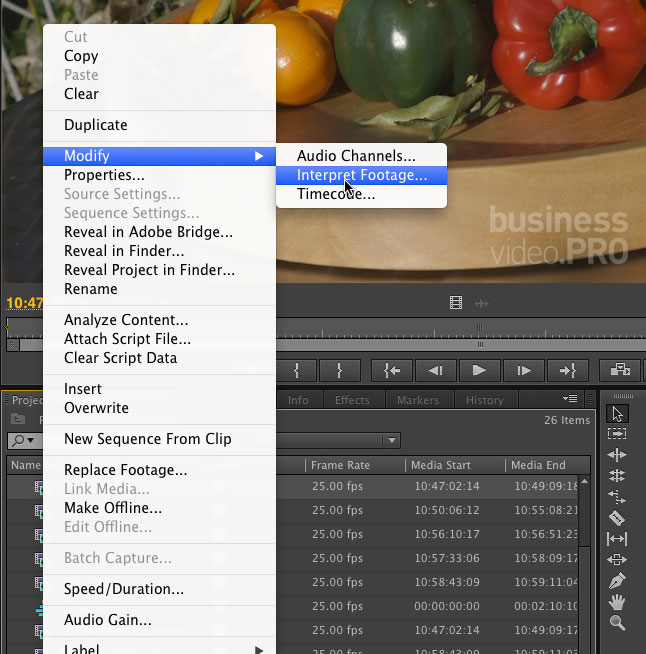
To cure this, we must tell Premiere that each 25psf clip from the C100 really is progressive scan, and it should lay off trying to fix something that isn’t broken. Control click your freshly imported C100 clips and select ‘Modify’ from the pop-up menu, then select ‘Interpret Footage…’
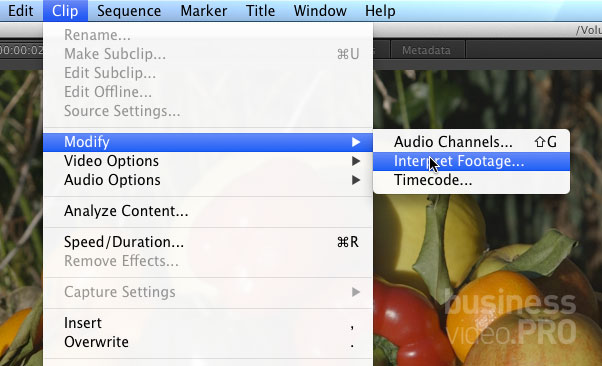
Alternatively, with your clips selected, choose ‘Interpret Footage…’ from the ‘Clip –> Modify’ menu.
Modify Clip
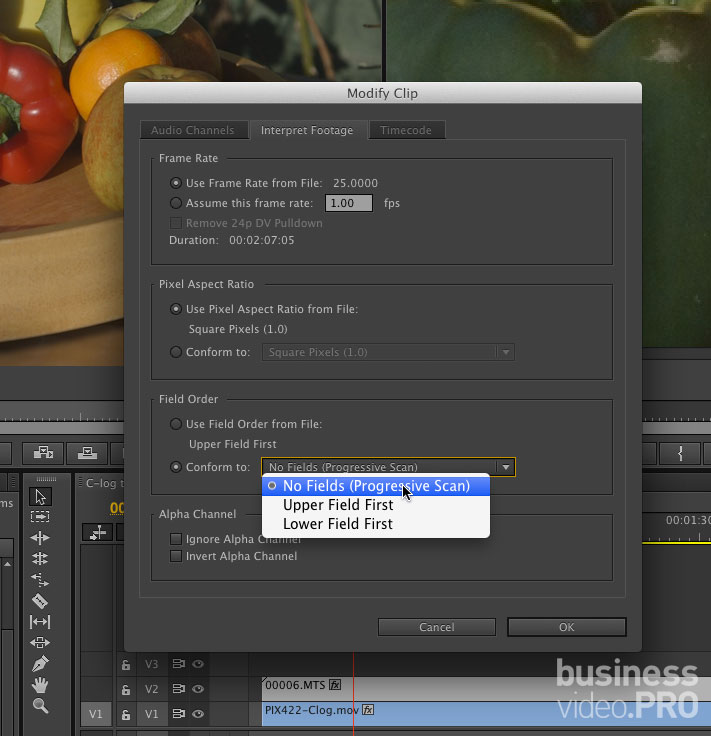
In the ‘Modify Clip’ dialog, the ‘Interpret Footage’ pane is automatically brought to the front. Click on the ‘Conform to:’ button and select ‘No Fields (Progressive Scan)’ from the pop-up:
PP Edges after
Now your clips will display correctly at their full resolution.

Final Cut Pro X – before:
The initial situation looks much worse in FCPX, which seems to have a bit of an issue with C100 footage, even after the recent update to version 10.1.

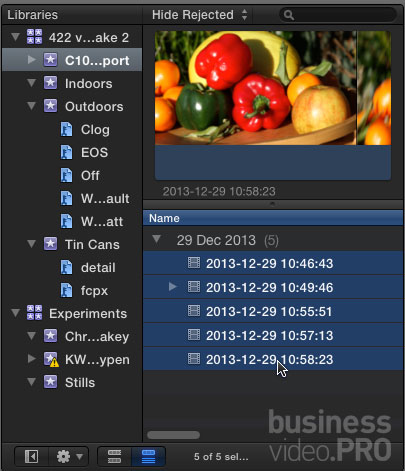
Select imported clips
The key to the FCPX fix is to let FCPX completely finish importing AVCHD before you try to correct the interlace problem. If you continue with these steps whilst the footage is still importing, changes will not ‘stick’ – clicking off the clips to select something else will show that nothing has really changed. Check that all background tasks have completed before progressing.
First, select all your freshly imported C100 clips. Eagle-eyed readers may wonder why the preview icon is so bright and vivid whilst the example clips are tonaly calmer. The five clips use different Custom Picture profiles.
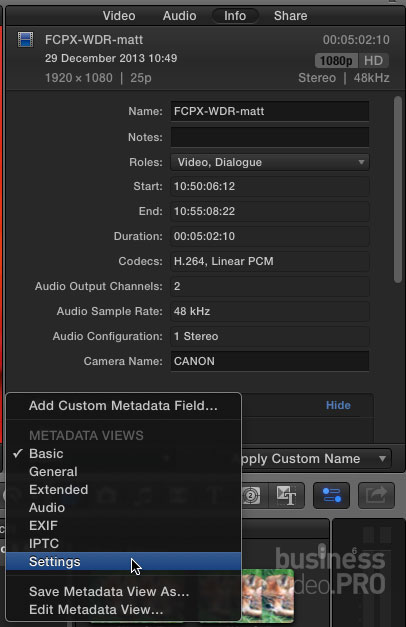
Switch to Settings in Info tab
Bring up the Inspector if hidden (Command-4), and select the Info tab. In the bottom left of the Inspector, there’s a pop-up to show different Metadata views. Select Settings.
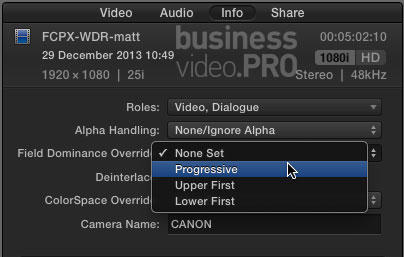
Change Field Dominiance Override to Progressive
In the Settings view of the Info pane, you’ll find the snappily titled ‘Field Dominance Override’, where you can force FCPX to interpret footage as Progressive – which is what we want. Setting it as Upper First will cater for almost all interlaced footage except DV, which is Lower First. Setting it back to ‘None’ lets FCPX decide. We want ‘Progressive’.
Final Cut Pro X – after:
Now the video displays correctly.
The before & after:

Wait do you know if it’s doing this on the American side as well? 24fps in other words. I notice a funny line down the center of my footage that sometimes appears and other times doesn’t at random.
Thoughts ?
Using premiere creative cloud
That’s an interesting one.
If you’re talking about stuff from a Ninja, which is picking up 60i and trying to spit out 24p, then that’s a whole new ball of wax. We have to get involved in 3:2 pull-down, the safe conversion of 24p material from stuff recorded in 60i. Yes, it can be done, but… it’s ticklish.
If you’re talking about a truly random occurence, i.e. it doesn’t fit the traditional cadence of Good-bad-bad-Good-bad-bad (the cadence – or rhythm – of AVCHD and its long-GOP structure of IBBP), or some sort of goofy 30p to 24p conversion (which can happen), then we may be ‘SoL’ – I’ve not heard of that sort of issue other than the pulldown or framerate-conversion things.
Oh yes I was talking about straight from the Camera. That funny line appears every now and then and I don’t know what to do about it. I’m always shooting 24p or 30p. So who knows.
…straight from the camera as in straight to SD Cards, not Pro Res, not Ninja. Thanks
dear matt
are you totally sure, that fcpx 10.1 treats c100 acvhd properly with the method described above?
other (including me) have still seen some strange behavior at 200% magnification (especially in the reds):
http://www.dvxuser.com/V6/showthread.php?317544-Is-C100-AVCHD-fully-support-by-FCPx-10-1-release&p=1986390509#post1986390509
(end of the first page)
thanks for rechecking, roman
LOL – Roman, you’re racing ahead! Two different issues.
I’ve got my next blog post that investigates exactly that – the issue with the interlaced reds. There is a solution.
And then I’ll do the one that investigates high motion/detail with both AVCHD and external recorders. And then there’s the one about how noise upsets compression… and so on.
matt
it’s wonderful to learn that i’m not seeing ghosts the first day of the year…
thanks a lot for your investigations and all the best for 2014!
Roman – can you stop by my business website and drop me a line (http://www.mdma.tv/contact.php) – when I have your email from that, I’ll send you a link to the preview version of the next blog post that deals with the edges. Would be good to get some feedback before it goes live. LOL
Pingback: C100 Chroma Subsampling – the fix | Travelling Matt
Pingback: Ninja Blade – 2:2 Pulldown with Canon C100 | Travelling Matt
Hi Matt. Great tip for FCP x to change clips to progressive. Question: Is a 3:2 pulldown possible in FCP X? I’m asking because I am outputting on the C100 24p to Atomos Samurai (recording at 60i). Now I’m trying to turn the 60i back into 24p. Any ideas?
I’m trying to record the C100 using a Black Magic Ultrastudio Mini Recorder, but am encountering basically the same issue (recording 24p but wrapped in 60i via the HDMI output). I sounds like some of the Atomos recorders are smart enough to detect and record that original 24p, but I can’t find anything on the inter-webs about how to do it with Black Magic software.
This may have to be done in Post – either at ingest or via a transcode.
Has anyone tried recording the C100 to the Odyssey 7 yet? Not the 7Q.
Nobody I know of, sadly. Opening it up to the wider world?
Any way to batch process the above for premier?
Don’t worry just found it 🙂
Hi Matt, thanks for this post! We’ve been looking a long time for a solution to this problem. We even considered buying a different camera… This is an awesome way to fix it and works fine for us! Thanks a billion!