
Super-whites are a quick way of getting extra latitude and preventing the video tell-tale of burned out highlights by allowing brighter shades to be recorded over the ‘legal’ 100% of traditional video. However, it’s come to my attention that some folk may not be reaping the advantages of superwhites – or even finding footage is ‘blown out’ in the highlights where the cameraman is adamant that zebras said it was fine.
So, we have a scale where 0% is black, and 100% is white. 8 bit video assigns numbers to brightness levels, but contains wriggle room, so if you have the Magic Numbers of Computing 0-255, you’d assume black starts at 0, and white ends up at 255. Alas not. Black starts at 16, and white ends at 235. Super whites use the extra room from 235 to 255 to squeeze in a little more latitude which is great.
But that’s on the camera media. Once you get into the edit software, you need to make sure you obey the 100% white law. And that’s where things go a bit pear shaped.
If you can excuse my laundry, here’s a shot with 109% whites – note them peeping up above the 100% line in the waveform monitor:
(Click the images below to get a full view)

Note also, that the fluffy white clouds are blown – there’s ugly detail snapping from pale blue to white around them. Although I shot this so I just got into 109%, the monitor shows us the 100% view, so it’s overexposed as far as the editor’s concerned.
So in my NLE – in this case, Final Cut Pro X – I drop the exposure down, and everything sits nicely on the chart. I could pull up the blacks if necessary…

But I’ve been told about an app called 5DtoRGB, which pre-processes your 109% superwhite footage to 100% as it converts to ProRes:

Note that it is indeed true that the whites are brought down to under 100%, the blacks are still quite high and will require pulling down in my opinion. 5DtoRGB takes a lot longer to process its ProRes files – I’ve reports of 10x longer than FCP7 Log & Transfer, but I’ve not tested this myself.
I did some tests in Adobe Premiere CS6, which demonstrates the problem. We start with our NATIVE AVCHD clip, with whites happily brushing the 109% limit as before. These are just 1s and 0s, folks. It should look identical – and it does. Info in the Waveform Monitor, blown whites in the viewer.
Another technical note: the FCPX Waveform Monitor talks about 100% and 0%, but Adobe’s WFM uses the ‘voltage’ metaphor – analogue video signals were ‘one volt high’, but 0.3 volts were given over to timing signals, so 0.7 volts were used to go from black (0.3 volts) to white (1 volt). So… 0.3 = black in Adobe’s WFM. And another thing – I’m from a PAL country, and never really got used to NTSC in analogue form – if I remember correctly, blacks weren’t exactly at 0.3 volts, also known as IRE=0 – they were raised for some reason to IRE=7.5, thus proving that NTSC with its drop frames, 29.97 fpx, error-prone colour phase and the rest, should be buried in soft peat and recycled as firelighters. But I digress. Premiere:

Let’s get our Brightness and Contrast control out to bring the 109s down to 100:

Hold on a tick, we haven’t adjusted ANYTHING, and Premiere has run a chainsaw along the 100% line. That white detail has been removed until you remove the filter – you can’t get it back whilst the Brightness & Contrast filter is there. Maybe this isn’t the right tool to use, but you’d think it would do something? Not just clip straight away?
I tried Curves:
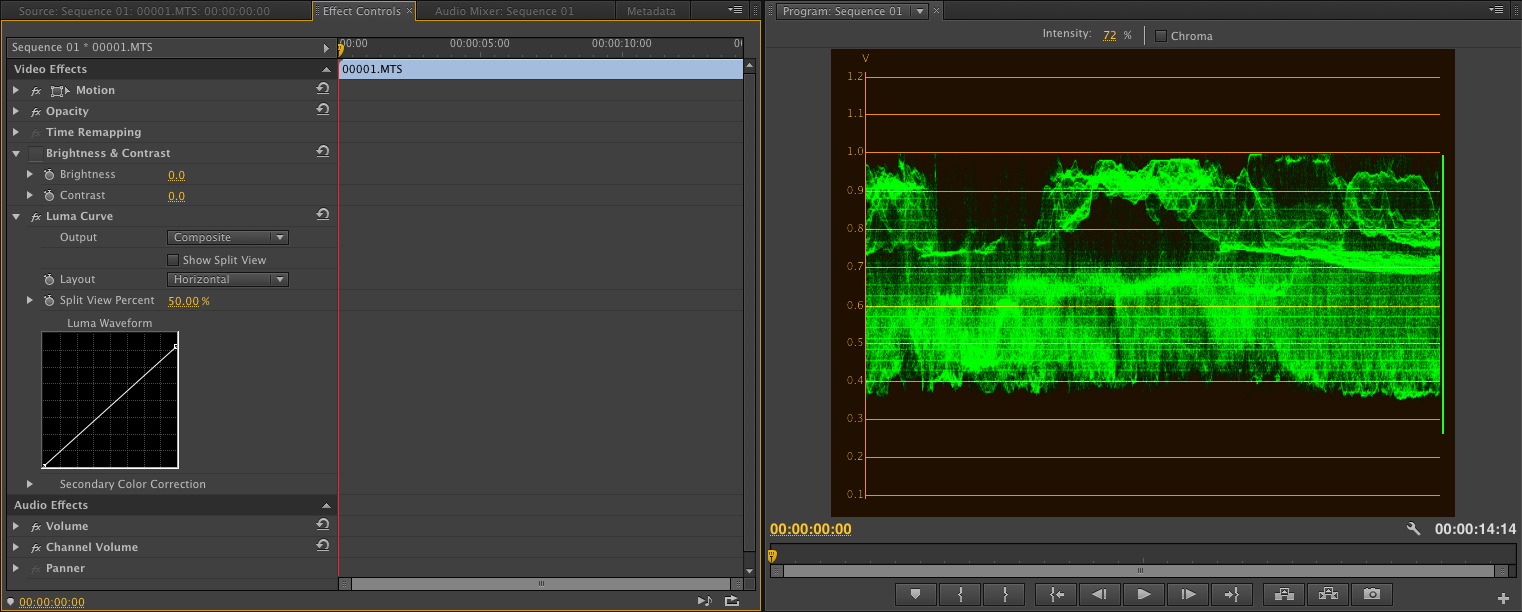
It’s tricky, but you can pull down the whites – it’s not pretty. Look how the WFM has a pattern of horizontal lines – that’s nastiness being added to your image. The highlights are being squashed, but you can’t bring your blacks down.
So finally, I found ‘ProcAmp’ (an old fashioned term for a Processing Amplifier – we had these in analogue video days). This simply shifts everything down to the correct position without trying to be clever:

At last. We have our full tonality back, and under our control.
With all these issues, and probably some misunderstanding about 109%, I can see the desire for something safe and quick using the new FS700 cinegammas in the form of CineGamma 2, which only allows 100% whites, ditto Rec709 in the FS100. But forewarned is fore-armed.
I donate the last 9% of my brightness range to specular highlights and the last shreds of detail in the sky, so I can have that ‘expensive film look’ of rolled off highlights. But if I didn’t haul them back into the usable range of video, all that stuff would appear as burned out blobs of white – ugly. However, I also spent a bit of time testing this out when I switched from FCP7 to FCPX, as the former took liberties with gamma so you could get away with things. The bugs in FCPX and Magic Bullet made me check and check again.
It’s been worth it.
